How to make Author Bio pages for authority and SEO performance
Author bio pages are an important part of your website's user experience. They demonstrate credibility, authority, and trust which is important not just for users, but for your search engine performance.
This page covers everything you need to know when it comes to author bio pages. We've also included design templates, and schema code (we'll get to that) so this is the first, last, and only guide you'll need on the subject.
Quick Intro
The author bio page is the page that includes all the relevant information about someone who writes for your website. It is commonly linked to from the "byline", which is just their name listed under the title of the blog post. Here's an example from: https://a16z.com/the-year-to-be-great/
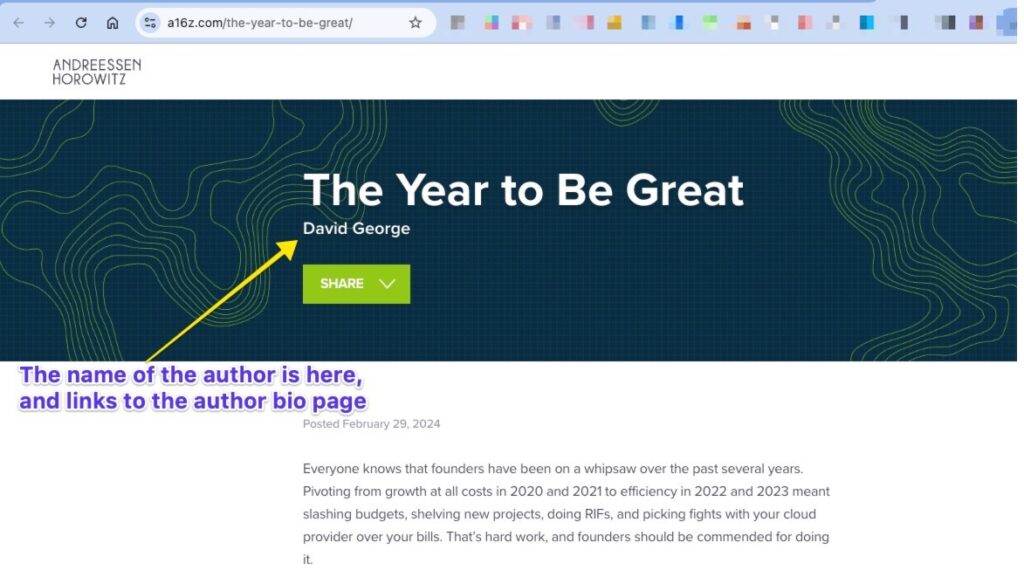
When you click on the author's byline on the blog post, it takes you to the author's bio page, again from our example: https://a16z.com/author/david-george/

So far, pretty straight forward. This page has several common elements, let's start with the basics:

Fundamentals all author bio pages need
These are the main elements every author bio page should have:
- A URL that makes it obvious this is a author's page on your website. Often this is done by having "/author/" as the directory in the URL.
- The author's name shown prominently at the top of the page. Usually this will be in an H1 or H2 HTML tag. Underneath their name should be their job title, or a title that's relevant to what they do in the context of writing for that website.
- A welcoming headshot of the author. Some blogs may use an avatar or a more private image (for example: crypto or NFT blogs).
- An about section that establishes the author's relevant credentials, expertise, and authority.
The design A16Z has gone with is quite a common one. Here are some more to look at.
Healthline (health, medical)
https://www.healthline.com/reviewers/dana-kim
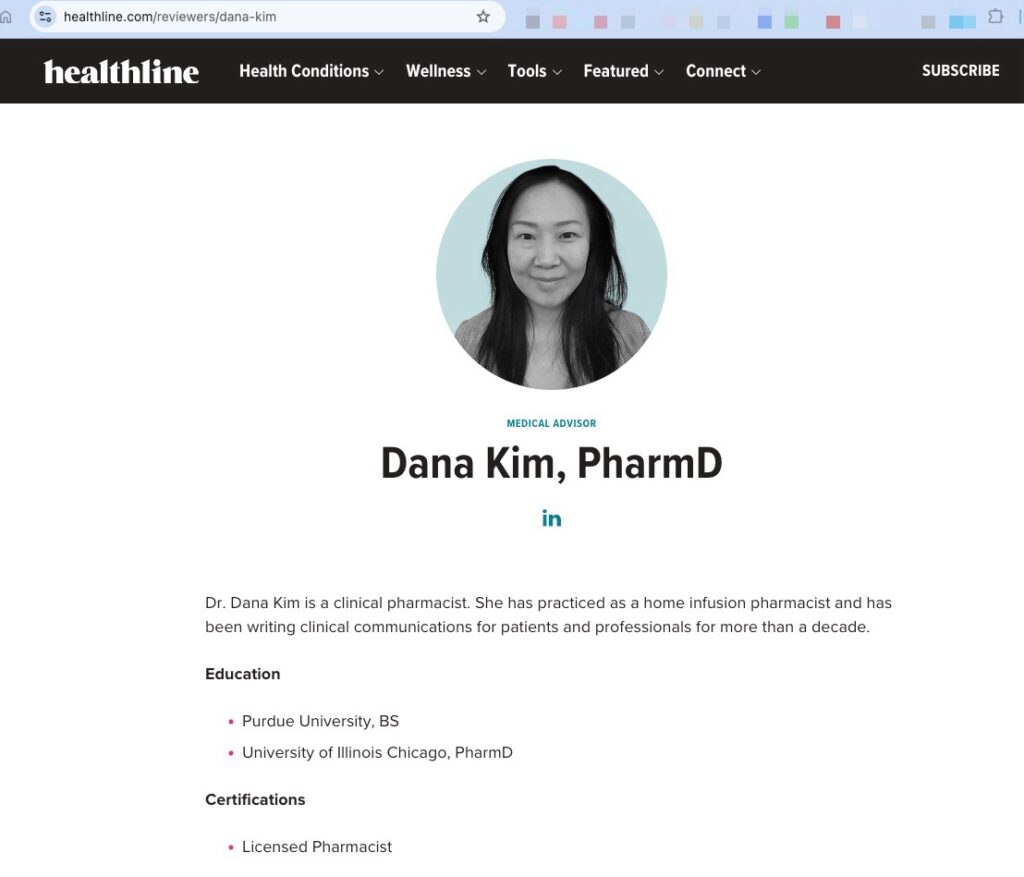
Focuses on establishing the formal credentials and does that well.
Making sense of cents (personal finance)
https://www.makingsenseofcents.com/author/michelle
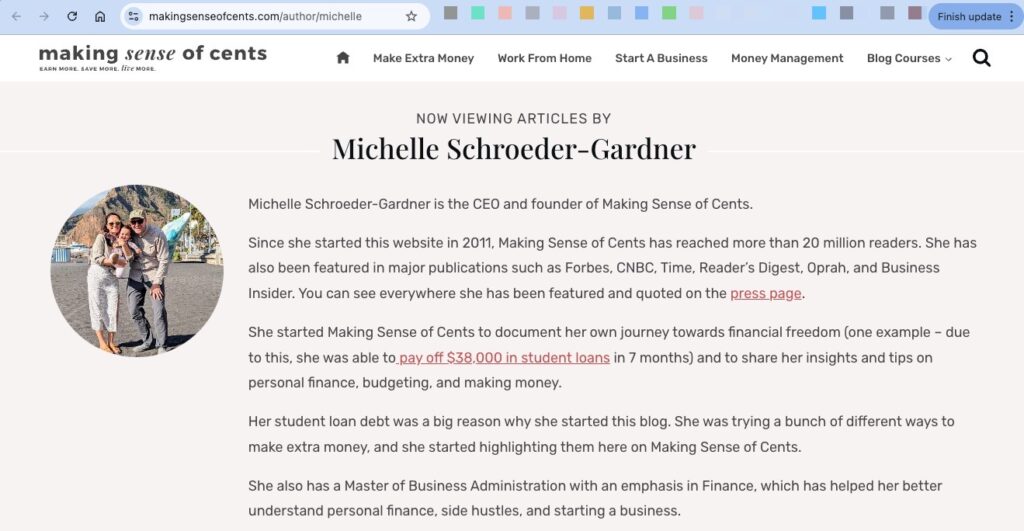
Establishes the credentials, and humanity, of the author, who is also the CEO and founder. The picture also drives connection with the reader.
Thought Catalog (entertainment, culture)
https://thoughtcatalog.com/sabrina-bendory/
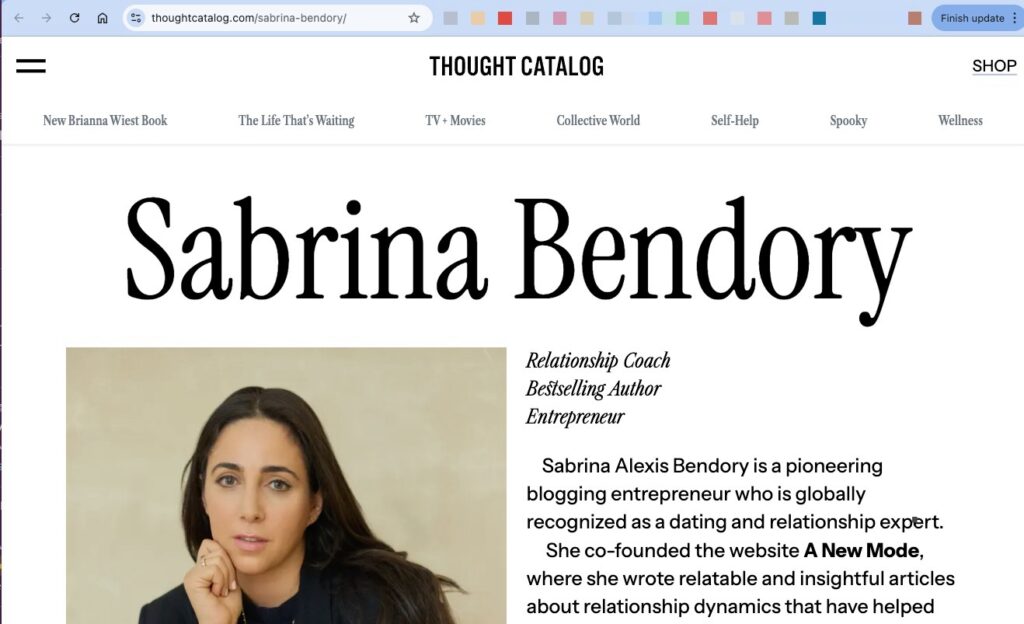
Lovely design, great picture, and big header.
The Everygirl (beauty, fashion)
https://theeverygirl.com/contributor/tinsley-crisp/
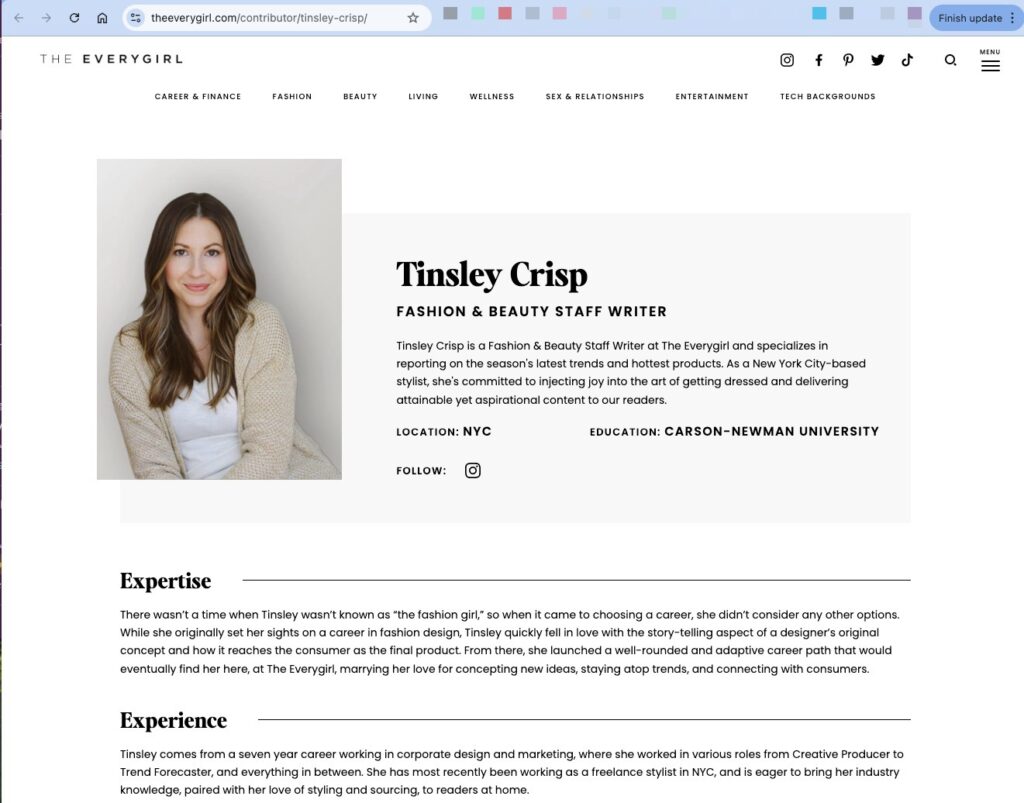
Also great design, and very tidy layout.
Additional Elements
So far we've covered the fundamentals your author bio page should have. But there are additional elements you can include. From the examples above, you can also see how different niches incorporate different elements. Depending on your field, you'll want to emphasize some of these elements, while minimizing or ignoring others.
These are:
- Social links, especially to LinkedIn profile, but also to Twitter, Instagram (especially for aesthetic brands like beauty and fashion), Facebook (less common), Twitch (if you're in video games, or similar), and other social media for other niches.
- Link to your personal site (most sites won't allow this because it can lead to spam from backlinks, or lose traffic to the author's blog)
- List of posts they've contributed to the site. This is quite useful to your blog, and helps search engines understand the structure of your site, while also encouraging users to read more articles.
- List of educational credentials – very important in healthcare, pharmaceuticals, legal, and any field where practitioners are required by law to be licensed.
- List of career achievements (similar to credentials).
- List of professional memberships. Think bar accreditation for lawyers.
- List of publications. This is especially important in medical research where authors may have a pubmed profile and have produced peer reviewed research.
- List of awards and achievements. Less common but can be used to highlight expertise and authority.
- A video introduction at the top of the page. This can be a good way to drive engagement, and show expertise and authority in a deeper way.
- A feed of their most recent tweets. Especially useful for prolific thought leaders who tweet a lot. This is much rarer for a site to have. But if it makes sense then I recommend having this.
- A list of the author's favourite content from other websites. This is best for a site that is purely about ideas, like an essay-focused website.
- A list of the author's posts on other websites. Also for a site primarily focusing on ideas.
- An email signup element to drive newsletter subscribers, or to collect user emails.
I created a mockup to show you what all of these elements would look like on a single author bio page (note, I generally would not recommend showing all of this content on the author bio page:
Adding Schema to Author Bio Pages
Another important aspect to establishing the credibility and trust within author bio pages is to implement schema on the page. Schema is a type of markup language that you put inside the HTML (so it's not visible on the surface of the author bio page). It adds context and information to text and different elements on the page to make it easier for search engines and AI to understand what is on the page.
It does this by referencing the schema.org protocol. Before I get into exactly what kind of schema to use for the author bio pages, let me explain the two ways you can implement schema. The first is to implement RDFa / Microdata, which looks like this:
<html lang="en" vocab="https://schema.org/" typeof="BlogPosting">
<head>
    <meta charset="UTF-8">
    <meta name="viewport" content="width=device-width, initial-scale=1.0">
    <title>How to create amazing author bio pages</title>
</head>
<body>
    <header>
        <h1 property="headline">How to create amazing author bio pages</h1>
        <div property="author" typeof="Person">
            <span property="name">Christian Thurston</span>
            <link property="url" href="https://sagashilabs.com/authors/christian-thurston" />
        </div>
        <time property="datePublished" datetime="2025-03-07">March 7, 2025</time>
    </header>
</body>
</html>
This is where the schema is wrapped around each item (see the div property and time property in bold above). This is a nightmare, do not – I repeat, do not bother with RDFa or Microdata schema. Not. Worth. It.
Instead you want to implement Schema JSON-LD. I know, I know, all these terms sound really technical and intimidating. I have a hard time remembering them myself. So just bookmark this post if you need to and remember: RDFa bad, JSON-LD good.
So what makes JSON-LD good? Well, instead of weaving it through the code which is incredibly painful, error-prone, and just not necessary, it just puts all the schema in one place and states it. So for the example above, the JSON-LD code would be:
<script type="application/ld+json">
    {
      "@context": "https://schema.org",
      "@type": "BlogPosting",
      "headline": "How to create amazing author bio pages",
      "author": {
        "@type": "Person",
        "name": "Christian Thurston",
        "url": "https://sagashilabs.com/authors/christian-thurston"
      },
      "publisher": {
        "@type": "Organization",
        "name": "Sagashi Labs",
        "url": "https://sagashilabs.com"
      },
      "datePublished": "2025-03-07",
      "about": {
        "@type": "Thing",
        "name": "author bios"
      },
      "copyrightHolder": {
        "@type": "Organization",
        "name": "Sagashi Labs"
      }
    }
</script>
It's pretty easy to read. You can have a developer implement it or, just do what I do, get AI to write it for you (at the time of writing, Claude.ai, and ChatGPT would be two reliable places to go).
What schema should you include?
For author bio pages there's a few different schema types to include. The most important is:
- Person schema, SameAs property to demonstrate experience, expertise, authority and trust
- Person schema, knowsAbout property to demonstrate experience, expertise, authority and trust
- Person schema, alumniOf property to demonstrate experience, expertise, authority and trust
- Person schema, description property to demonstrate experience, expertise, authority and trust
But there are other properties to include:
- We're calling the Person schema, which you can see here: https://schema.org/Person
- Property of person schema: name
- Property of person schema: jobTitle
- Property of person schema: URL pointing to their author bio page on the site (and yes, this will be the page the schema is placed on for the author bio page)
- Property of person schema: image
- Property of person schema: sameAs
- List under the sameAs property: LinkedIn profile link, Twitter profile, Bar or Medical Association or any other professional listing profile, their github account if they have one, and any other personal profile page that demonstrates their credibility. This establishes the person as an entity, as well as who they are across the web. This is huge for demonstrating legitimacy, and expertise. Especially important in a content world with rampant AI generated content.
- Property of person schema: description
- Property of person schema: knowsAbout – another opportunity to establish expertise
- Property of person schema: alumniOf – this is another opportunity to showcase expertise and bona fides. Legal, health, financial, and YMYL spaces (your money, your life, a Google designation of spaces where expertise is especially important).
- Organization schema, with properties for name and URL. You can add address if your organization has a physical location.
<script type="application/ld+json">
    {
      "@context": "https://schema.org",
      "@type": "Person",
      "name": "Christian Thurston",
      "jobTitle": "Senior Content Strategist",
      "url": "https://sagashilabs.com/authors/christian-thurston",
      "image": "https://sagashilabs.com/images/authors/christian-thurston.jpg",
      "sameAs": [
        "https://twitter.com/ct_oz",
        "https://linkedin.com/in/christian-thurston",
        "https://github.com/cefthurston",
        "https://gdaychris.com/"
      ],
      "worksFor": {
        "@type": "Organization",
        "name": "Sagashi Labs",
        "url": "https://sagashilabs.com"
      },
      "description": "Christian Thurston is a senior growth and SEO strategist specializing in organic search growth. With over 10 years of experience in the tech industry, Christian helps companies develop clear, effective organic search strategies.",
      "knowsAbout": ["Content Strategy", "Growth Marketing", "Organic Search", "SEO"],
      "alumniOf": {
        "@type": "CollegeOrUniversity",
        "name": "University of Sydney",
        "url": "https://www.sydney.edu.au/"
      }
    }
</script>
You can go further, but the main items to demonstrate EEAT (experience, expertise, authority, and trust, as Google likes to call it) are the ones listed above.
How to implement schema on your author bio pages?
This depends on your setup, and how much you want to just add schema to your author bio pages vs other pages on your site. Personally I'd recommend implementing it across your site, but let's focus on the author bio pages.
Method 1: Use AI + HTML
The simplest way is to copy and paste this prompt into AI, and then copy and paste the JSON-LD code into the editor of your author bio page. It's the most direct, and if you're good at figuring things out, then this is the way for you (if you feel fear around trying this, then skip to other methods):
Please generate HTML code that I can directly copy and paste into the author bio page. You can assume that all the initial headers and HTML conventions at the top of the page have been covered (and I don't want to repeat them accidentally when copying and pasting into the editor in my CMS). The HTML code should call schema.org and we'll be implementing it using the JSON-LD method. Here are the schema types I want you to use, and the properties for each of them:

@type = Person, with properties:
- name:
- jobTitle:
- url:
- image:
- sameAs: – For this item list all of the following URLs:
- description:
- knowsAbout:
- alumniOf, including @type = CollegeOrUniversity with properties:
-- name of organization the person is an alumni of:
-- url of organization the person is an alumni of:
– worksFor, which then nests the @type = Organization, including the properties:
-- name of the organization:
-- URL of the organization:

Thank you!
Obviously, fill in all of the relevant information for your site in the spaces above after you paste that snippet into the AI of your choice (I use Claude, but use whatever you wish). Then paste the HTML it gives you into the HTML of the author bio page.
Method 2: Add a plugin to your CMS
If you're on a common CMS, then you can add schema via plugins. After that, it all depends on how the plugin works, so I'll let you figure it out from there. But here's a list of plugins on popular platforms.
WordPress
- https://wpschema.com/
- https://rankmath.com/
- https://yoast.com/wordpress/plugins/seo/
- https://wordpress.org/plugins/schema-and-structured-data-for-wp/
Shopify
Webflow / Joomla / SharePoint
- I could not find any good schema solutions for these or other platforms.
Method 3: Get your dev team to do it
Well, if you have a dev team, you've probably already sent them this post.
Author bio page design and layout
OK, so you now know what needs to be on the page and in the HTML code. But let's imagine you're trying to build the author bio pages from scratch. Or maybe there's a default layout with your site theme or setup and it doesn't include the design elements you want and need on the page. What then?
Well, don't worry, we have you covered with a complete design hub in Figma.
You can find it here:
The main purpose of this design resource is to make it fast and easy for you to:
- See author bio page designs from real sites, and gain inspiration from these.
- Narrow in on the design elements, and layout that you want.
- Use the letter and number system (A1, J7, B36, etc) so you can share this resource with your design and dev team and tell them quickly and easily what you want the design of your author bio page to be.
- Use the Figma files yourself to design your own ideal author bio page, and author byline and then build it directly, or send it to your design/dev team.
And here's exactly how you should use this hub...
Author Bylines
Author byline schema
Author byline design options
Feedback
If you have feedback on this piece, author bio page designs, byline designs, schema notes, or any other information you think I should add to this page or resources to make it better, please ping me on twitter are twitter.com/ct_oz – that's the best place for me to see it.
Alternatively, if you want to work with us on your SEO, then please...